Have you ever lost your cool during a game because your serve in tennis just wouldn’t connect? There are definitely a few minor errors in your form and serving technique, but we can correct them with a few straightforward actions. The serve is frequently more of a liability than an advantage when the serve technique is incorrect. Simple serving instructions won’t help you master the proper tennis serving technique.
Tennis serves must be consistently practised both on and off the court to be hit perfectly. To speak the truth, the serve is the trickiest and most crucial stroke in tennis. You must thus master every single technical component of this stroke.
You may get additional free points by improving your tennis serve. Additionally, it will give you the ability to attack with the first ball, overpower your rivals, and win more games.
You can hit the finest tennis serve of your life by following these 11 steps.
Step 1: The Grip
Many tennis players use a forehand grip, which is a typical error that reduces the effectiveness of their tennis serve. As a result, the spin and speed that may be created are impacted since they are unable to swing the racquet along the proper swing path.
The best way to improve your tennis serve is to use a continental grip. Make sure your hand is inclined and that your index finger is somewhat spread on the racquet to get this grip. You’ll be able to feel your hand relaxing during the swing thanks to this, which will also help you gain control and feel.
Depending on the serve you wish to hit, there are now small variances. On the forehand side, for instance, you may shift your hand just a little to the right. With what is referred to as a firm continental grip, you may hit a flatter tennis serve and produce greater pronation.
Alternatively, you might slide your hand across to the backhand side. You can simply add extra topspin and slice to your tennis serve by using this grip. However, in order to get started and lay a strong foundation, getting a conventional continental grip is highly advised.
Step 2: Start
You want to have a strong base in the beginning position with your feet positioned properly on the ground. You should stand with your back to the side fence and your body facing it. Additionally, you’ll be looking at your target from behind yourself with your head and eyes.
Many players start off quickly and raise their racquet too early, which affects their timing and rhythm. Additionally, they are holding their hands and arms with too much stress. So before entering the swing’s acceleration phase, you start the action at a modest pace.
Likewise, when you become conscious of how firmly you’re gripping the racquet, make sure to maintain a comfortable posture with your shoulders back and arms at your sides. Creating a dependable pre-serve routine you may, for instance, inhale deeply before starting your action and bounce the ball a certain number of times before each serve.
Step 3: The Stance
Your feet should be positioned such that your front foot is towards the right nett post (for right-handed players) and your rear foot is parallel to the baseline. This is the appropriate tennis serve posture.
In order to remain steady after you start and complete your entire service motion, the toes of the rear foot are also generally aligned with the heel of the front foot.
This is a fundamental viewpoint that you may change based on who you’re serving.
The platform stance and the pin-point stance are the two different kinds of stances used as techniques in a tennis serve. When using the platform serve posture, the feet stay still throughout the whole serving action. You just coil and angle your body while bending your knees, then push off upward into the serve.
In contrast, the pin-point serve stance requires that you begin the serve from a platform stance, pull the back foot closer to the front foot as you toss the ball up, and then push off upwards towards the ball.
Both serve techniques in tennis are appropriate, although often more explosive players choose the platform stance, and taller players who aren’t seeking as much explosive force off the ground use the pin-point stance.
Utilising a platform stance when serving in tennis is advised. It is believed to assist you in developing your concealment, shoulder turn, leg drive, and contact point. Additionally, you’ll be able to serve with more topspin and use the arm appropriately.
In reality, platform stances are used by some of the greatest and fastest servers of all time, like Pete Sampras and Roger Federer. However, there have also been exceptional serves in tennis made with a precise posture, such as those of the Bryan Brothers and Goran Ivanisevic.
Step 4: First Move
One of the most crucial aspects of the tennis serve is the first motion. Most tennis players don’t have the right shoulder turn, which is essential for simple, effective serving. Natural, effortless power is hard to come by when the upper body isn’t functioning correctly. It is also not possible to acquire an extra disguise in order to confuse the adversary.
Feel your body, in particular your shoulder, begin to turn slightly to execute a strong first motion. Your serving arm should follow your throwing arm as you throw. To put it another way, the serving arm must trail or wait behind the hurling arm.
In order to prepare to release the ball, keep your throwing arm straight and lift it smoothly. During this stage, your serving arm may be bent or straight. As the racquet goes towards the pendulum position, you may concentrate on maintaining its closed posture.
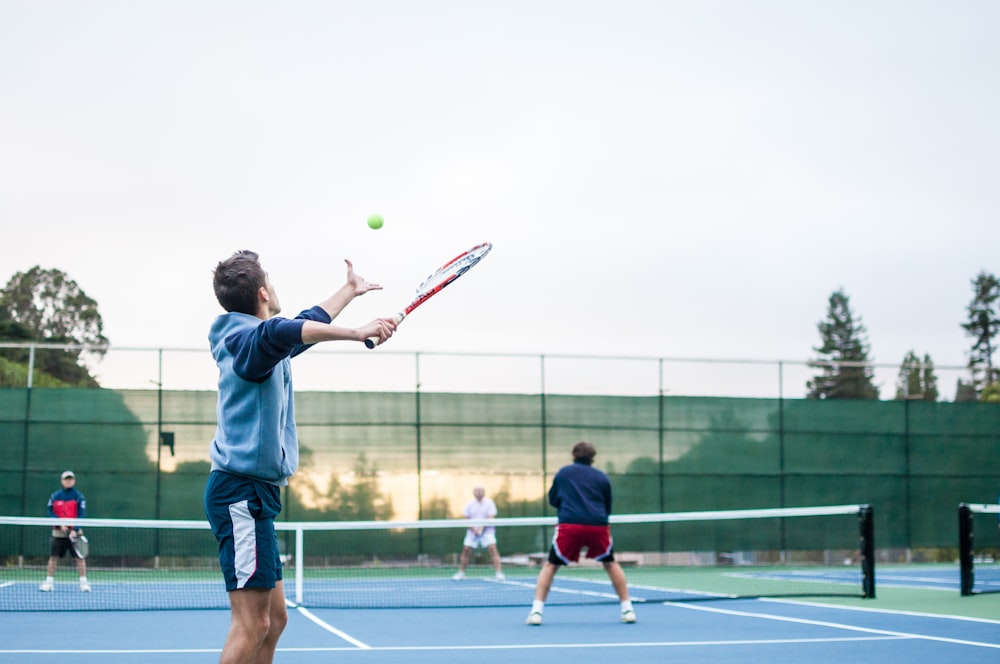
Step 5: Toss
Even the fastest server, Roger Federer, acknowledged the value of the coin toss. Tennis players sometimes lament that their throws are unpredictable. It’s crucial to master a consistent throw by figuring out where to find the ball.
As you release the ball, keep your wrist in a neutral position and concentrate on gripping the ball with your fingertips. When the time comes to release the ball, keep your throwing arm straight and extend your fingers. Additionally, make sure your body is steady and that you are throwing the ball from your shoulder.
Understand how far the toss is out in front of you and how far it moves to the left or right if you want to hit a superb tennis serve. You must know how high or low to toss your tennis serve since the toss height is very crucial.
Step 6: Offhand and arm
While transitioning from the initial move to the racquet drop position, the throwing arm remains straight but is not quite locked. The throwing arm will be completely stretched up towards the sky before swinging up to the ball.
Before bursting up to the ball, try to maintain the palm of your throwing hand facing the side fence. This will enable you to maintain the shoulder rotation until the very last second. To obtain a maximal extension, place your offhand in a neutral position with your fingers slightly apart.
Step 7: The Trophy Position
One of the most important aspects of mastering your tennis serve is the trophy position. Lift your serving arm up to the sky while maintaining your throwing arm bent at about a 90-degree angle to get the perfect trophy stance.
Before the racquet drop phase, the racquet face is building momentum while remaining closed (it can go vertical at this stage). The knees are bent, the shoulders are turned, and the body is poised to leap into the ball.
Instead of bending your lower back, keep your wrists neutral and slightly push out your hips. It is advisable to continuously practise the trophy position at least three times each week to grasp this crucial serve component.
Step 8: Legs
Many athletes attempt to increase their power by using their legs, but they frequently do so incorrectly. Their tennis serve becomes less effective as a result. To develop rhythm, keep your legs straight at the beginning of the action. Then, while your elbow is bending, bend your legs.
You may jump with more force from the ground up if your knees are bent sufficiently. Don’t “squat” as you bend your knees during the serve; instead, make sure your leg drive is explosive.
Push off the ground with equal force with both feet if you are in a platform posture. Feel your front leg pushing off if you have a precise stance. To make your body lift and go towards the ball, slightly tilt your front hip towards the net. As soon as the serve is received, hop onto the baseline with your front foot.
Step 9: Racquet Drop
You don’t want to concentrate too much on this when practising your tennis serve. You must first adopt the proper grip, posture, initial action, and trophy pose. This will naturally cause the racquet to drop. Avoid scratching your back, and keep the racquet away from your head and back.
Maintain a relaxed arm and hand as you leap upward with your legs. When you move up to make contact with the ball, get the elbow to lead. If the step preceding it is perfect and in rhythm, this racquet drop will happen.
Additionally, a flexible shoulder is beneficial. The racket’s butt cap will be facing up, and the elbow will be hanging behind as it starts to lead up to the ball. You can easily produce power with this motion.
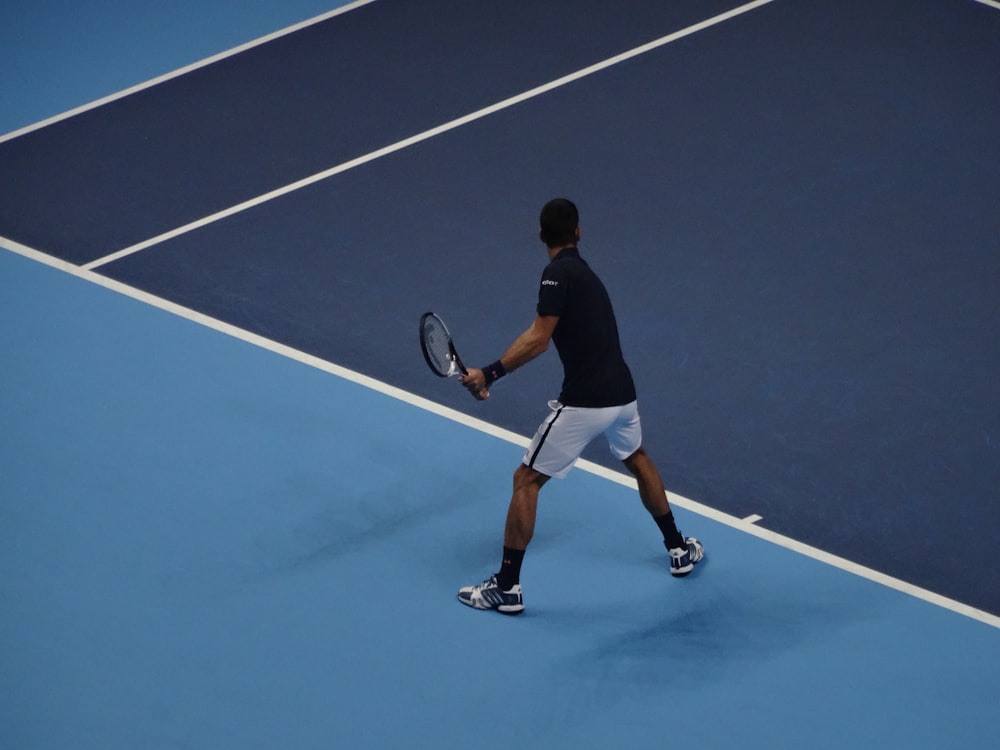
Step 10: Contact Point
With your arm straight above your body, make contact with the ball. You’re most likely to make contact with the ball on a first serve over the dominant shoulder. You should make contact with the ball above your head for a second serve.
Depending on the kind of serve being hit, the contact and toss locations might change, but the arm should always be fully extended. You may either let the ball fall slightly or make contact with the ball when it reaches its highest point.
Avoid looking at contact and maintain a more slanted posture. Additionally, maintain head contact and try to extend your entire body as you make contact with the ball.
In order to improve your serve consistency, it’s crucial that you establish the proper serve pace. As was previously said in Step 3, starting slowly is essential. You can accelerate all the way to the point of contact.
That racquet needs to be very fast in order for the ball to fly off the strings. This begins with a slower, more fluid, and smoother pace. The momentum continues to grow gradually after that until the swing’s subsequent acceleration. As a consequence, easy power may be produced along with maximum impact at the point of contact.
Step 11: Finish
One of the most underrated areas of the serve is the finish. It’s true that having a solid tennis serve technique might lead to the finish occurring spontaneously. You can concentrate on the finish by ensuring that your hand reaches the opposing pocket at the conclusion of the swing. In addition, you may finish the swing by bending your arm and placing your hand in front of your belly button.
At the conclusion of the swing, slightly curl the wrist so that the palm is facing up. As a result, you may provide the serve spin and control. After making contact with the ball, several players are able to leap onto the court and land inside the baseline. After the serve is made, other players must walk onto the court since they are unable to jump.
When jumping, be sure to touch down on the court with your front leg. Then, to attain ideal balance on your serve, kick up your rear leg from behind. In any case, you want to enter the court with some upward and forward velocity. To hit excellent tennis serves, get your body moving up and forwards.